Last weekend I decided to put away my books and do some crafting instead. With Valentine’s Day coming up I was in the perfect mood for something creative and when I saw the Inky Paws Challenge on the Newton’s Nook Designs blog, I thought why not try something like that for a change.
I’m actually quite new to the stamping world, so it’s nice to have some guidance, especially in form of a sketch that tells you where to place what. As I don’t own any physical Newton’s Nook Design stamps, because they are hard to come by over here, I was glad that they offer free digital stamps on their website. I chose the birds and decided to place them in front of a tree. Because I wanted two birds, I mirrored the digital stamp on my computer. To color the birds and the balloon, I used my Faber Castell watercolor pencils. I made a background stamp for the tree out of Fifty-Fifty silicone putty that I still had at home from a Halloween project. I also added a few leaves that I punched with a big heart punch and some yarn for the birds to stand on.
I think the card turned out quite well. There are one or two things I’d do differently the next time, but I still have problems parting with this card 😉
Salt and the City is Salzburg’s first blogger convention for food and lifestyle and was held on the last weekend of May. Caro, one of the organizers, assured us early on that book blogs are lifestyle blogs, so of course Nana and I had to join the fun.
Friday
The convention started off with an Instawalk. This was particularly funny, because I still have an old Sony Ericsson Cyber-shot phone that I love very much (who needs touch screens anyway?) and as a result I don’t have an Instagram account. I was thinking about bringing my bridge camera and then decided against it as I didn’t want to carry that heavy thing around the city. “It’s an Instawalk,” I thought, “so why don’t I just take pictures with my mobile phone?” And that’s what I did. You can see those “lovely” retro shots on our Facebook page.
Instawalk through Salzburg. Image provided by pixellovers.at
On our walk we got an exclusive tour of the Salzburger Landestheater where we went backstage and up to the millinery. I could have stayed there for hours just to try on every single stunning headpiece and hat. We had some schnapps at Sporer‘s, a liquor manufacture, and tipsily climbed four flights of stairs to the realm of Andreas Kirchtag, the workshop of Kirchtag umbrella manufacture. It was great to see how much work goes into a single umbrella and that not only can you choose the fabric of your umbrella but also the shaft. After this informative stop, we sat down for iced coffee and tea at Afro Cafe and recharged our batteries for one more climb. The highlight of the day was the view from Salzburg’s city hall tower which isn’t open to the public. On our way down we were treated to some delicious Venusbrüstchen chocolates, so I didn’t have to worry about bedtime candy that night.
Saturday
The cake topper I made.
Official convention day was Saturday and started with a breakfast table laden with muesli and excellent Rauch Juice Bar Grünschnabel spinach juice that I can’t seem to find in stores. I relaxed and chatted until lunch, as my workshops didn’t start until early afternoon. The first workshop was by Tina Tagwercher who gave a presentation on Thai fruit carving techniques and even though the time was too short to have a go at it myself, I’m fairly confident that I’d manage to carve a melon with the right tools. In the second workshop, I got to do some cake decorating. Dr Oetker sent a pastry chef and his assistant to teach us how to make fondant roses and pipe chocolate decorations. I had a good time and I think my cake top looks presentable.
Thai fruit carving
In the evening we were invited to dinner and a craft beer tasting at Trumerei. Unfortunately, I couldn’t enjoy this part of the day as a migraine hit me.
On Sunday it was time for the bloggers to explore Salzburg’s countryside. I was looking forward to a visit to Sonnleitn Alm in Abtenau but my migraine wasn’t gone when I woke up in the morning, so I had to pass on the first half of the outing. I joined the others for the second half though. We went up to Dürrnberg mountain to visit the Salt Mine. I’ve been there many times already and I have to admit that I don’t like the videos that you get to see touring the mine. You feel stupid watching them. They might do for children’s tours but adults would appreciate content instead of bad jokes. The mine itself is impressing though and you wouldn’t want to miss the boat ride on the salt lake and the slides.
When I arrived home, I finally had time to go through the two goodie bags that we got. I’m already excessively using my Riess mug for overnight oats, and I tried Quinoa for the very first time. It has a weird consistency that I think I like. 😉
I had a great weekend at my very first blogger convention and I hope that Salt and the City will return next year. Thank you girls for the hard work you did!
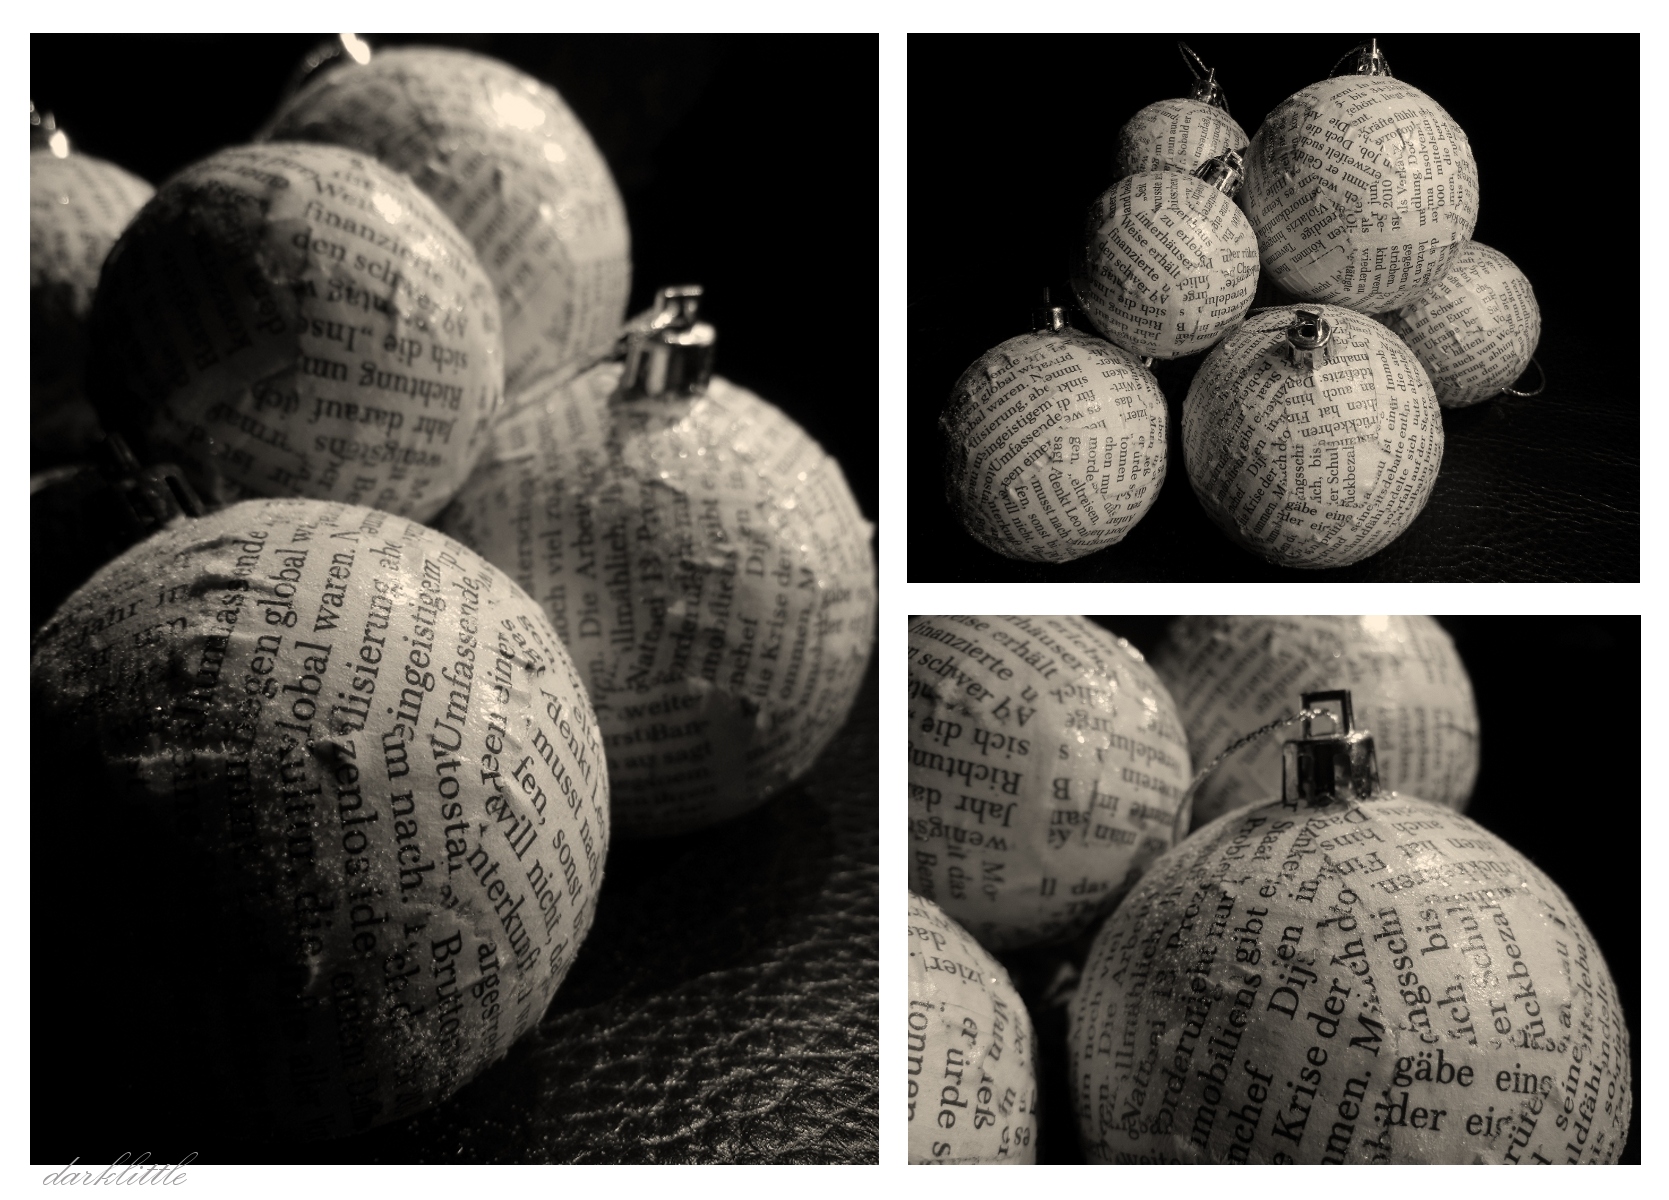
Are you already feeling the Christmas spirit, or do you belong to the group of those totally stressed-out by all the present buying, cookie baking and carol (or Christmas pop song) singing? It doesn’t really matter, because what I’m going to show you might calm your nerves. You can sit down on your own, or with family and friends and easily give a unique touch to those boring old Christmas ornaments that you’ve been using for the past five years.
But first I need to tell you something. This wasn’t my idea! I’ve seen pictures of those lovely ornaments on the internet and thought that I’d love to make some myself. I instantly fell in love with those in this article on the Flea Market Style homepage.
Glue (Decoupage Glue, Mod Podge,… The glue has to dry transparently)
Paintbrush
Glitter (if you like)
coat the ornament with pieces of newspaper
Now you just shred the newspaper into pieces and glue them onto the Christmas ornament. When you’ve coated the whole ornament with newspaper, you should coat the whole ornament with glue. Sprinkle with glitter as long as the glue is sticky and let the ornament dry hanging.
Finally, you can enjoy your very own Christmas ornaments! 🙂
I hope you are having a nice weekend. 🙂 I just finished a book I was chewing on for a while and you’ll get a new review soon.
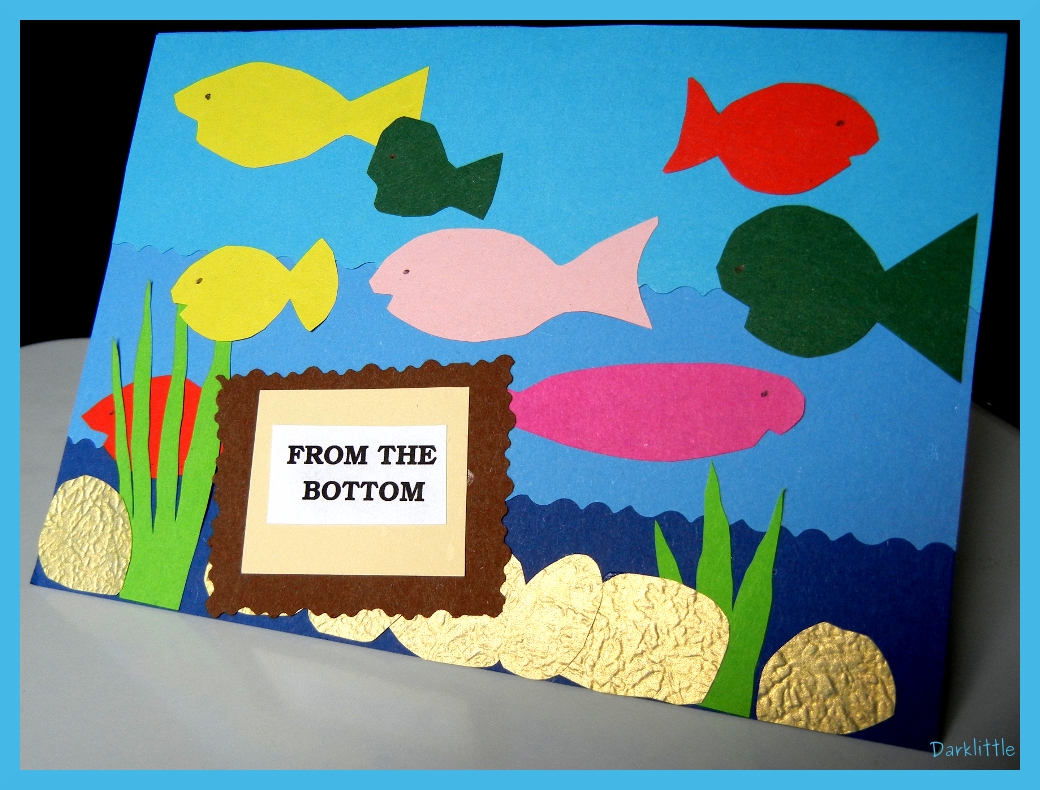
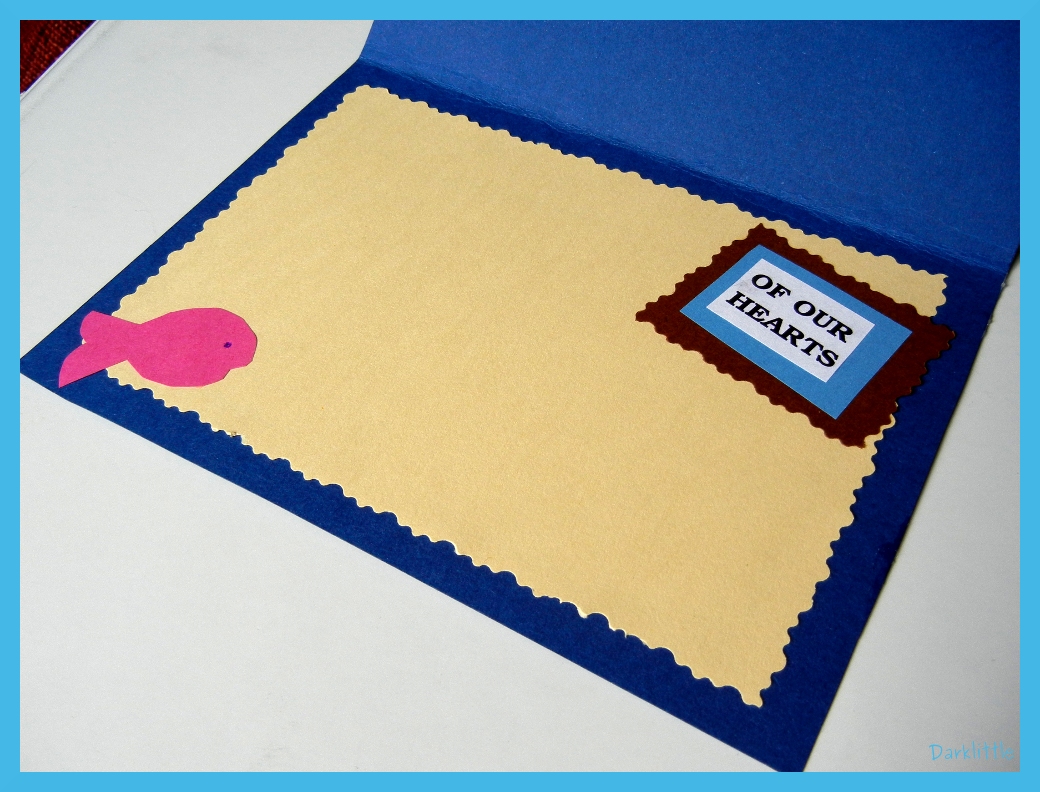
More than two weeks ago, my grandpa who lives in Canada had his birthday and I decided to make him an egg warmer and a birthday card. Grandpa loves fishing, so this was the overall theme of my crafts.
For his birthday card, I used all kinds of paper and I got inspired by this post by Scraps and Things and this is what it looks like:
The egg warmer I made for grandpa is a fish. I started making egg warmers this Easter. I make them out of felt and they come in all colors and shapes 🙂 So this is grandpa’s egg warmer, to keep his breakfast eggs warm:
I also sent my grandma a little something. More about that in another blog post 🙂
As I felt pretty crafty today, I thought I’d try to create one of those lovely little guys in Jane Bull’s Crafty Creatures. (I hope you all remember that digital ARC I got from DK Books a while ago) Well, the book was published last week (at least in the US. It will be out in the UK next week), so, if you like what you see, you’ll be able to buy it 🙂
Packed with more than 30 inspiring ideas, from fat felt cats, to dangly octopuses and zany pom-pom pals, Crafty Creatures and author Jane Bull help you create your own world of colorful, cuddly animals, as well as phone pouches, purses, jewelry, and more!
With helpful templates and patterns alongside basic sewing techniques, Crafty Creatures includes simple step-by-step instructions with detailed photographs to make sure everyone can accomplish any project in the book.
My Craft & My Thoughts
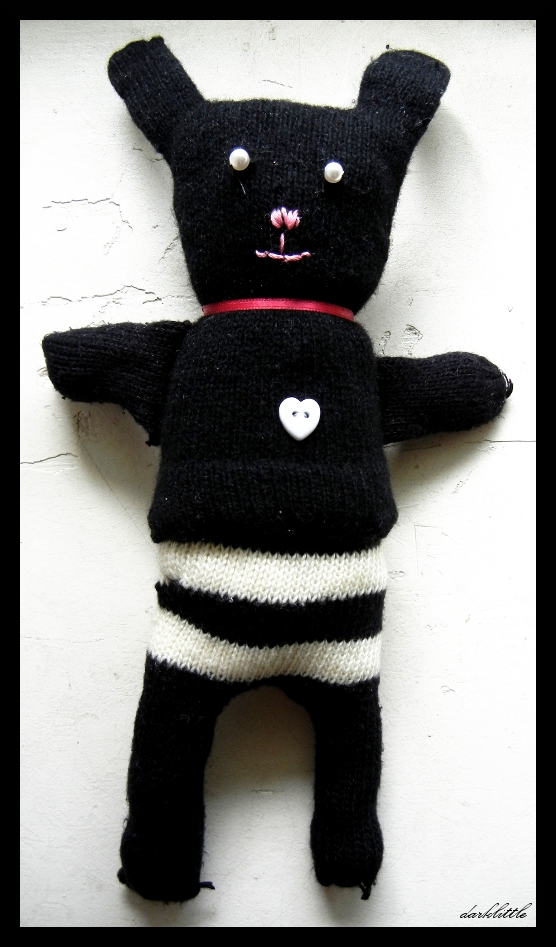
When I leafed through the book, I was instantly in love with one creature in particular. It was a little bunny made of an odd pair of old (or new if you like) gloves. The bunny (called Odd Bod in the book) looked so cute and it seemed like the perfect upcycling idea that wouldn’t be too hard to do. So I decided to make one. And after about one hour of work (well, I didn’t work constantly I guess), this is my result:
Now back to the book.
It is divided into 5 chapters: Woolly Animals, Friends in Felt, Sew Cute, Animals in Stitches and Sewing Kit and Useful Know-how
Woolly Animals features the following crafts: Woolly Octopus, Knittens, Koala Bear and Friends, Li’l Ted, Odd Bods, A Box of Monkeys, Ducklings
This is my favorite chapter. I think the creatures in it are big enough to play with. Plus, there is something for every difficulty level. And there are crafts that reuse material that would have otherwise been thrown away.
Friends in Felt includes: Pocket Pets, Big Pets, Mobile Owls, Cozy Cats, Minimals, Templates, Wild Ones, Bees and Bugs
The crafts in this chapter are cute and I love felt. They all are pretty flat though. And I don’t really know what to do with most of them. The mobile is an exception. And there is a tip to turn the small, flat animals into brooches, which is a nice idea.
Sew Cute features: Dog’s Best Friends, Pretty Birdies, Bunny Girls, Doodlephants, Your Little Pony, Jolly Giraffe, Cat’s Bed
This chapter has bigger designs than the last one. The Bunny Girls are made to play with and so is the Jolly Giraffe (which has a great design by the way). I also like the idea of the Doodlephants: They are plain elephants you can draw on, so you can create a unique creature. Great idea for a party!
Animals in Stitches shows you how to do: Pictures in Stitches, Pet Portraits, Stitch a Doodle, Doodle Decorations
There aren’t any real creatures to craft in this chapter. It just shows you how to stitch animals and how to use stitched things in your projects.
And Sewing Kit and Useful Know-how includes the chapters: Creating Creatures, How to Stitch, Spring Chickens, Mice Made Easy, How to Knit, Knit Stitch, Purl Stitch, Knitting Shapes
This chapter is very useful, as it explains steps that are the basis for some crafts.
To sum it up, I think that Crafty Creatures is a very nice book for people who are interested in starting to knit or sew cute little animals. There are some ideas to pick up for experienced crafters, but I think that beginners and less-experienced people will have more fun with this book (especially if they have an interest in knitting!). As I’ve mentioned before, some of the crafts are small and quite flat, so their purpose isn’t quite clear. I think they could make nice decorations for presents (if the gifted person appreciates the effort). So decide for yourself if this is the book for you. I definitely enjoyed making that cute little bunny!
Hello dear reader chum (okay I stole that from Miranda Hart),
As you all know, in June, I participated in a reading challenge. One of the tasks we had to do was to mail something to Karla of the Lovelybooks team that had to do with Summer, Sun and Far Off Places. We were instructed not to send valuable items (no bribes) and the item/s should fit into an envelope or similar.
So I decided to craft a postcard that had to do with the book the challenge was about. (At that point, I hadn’t even received the book)
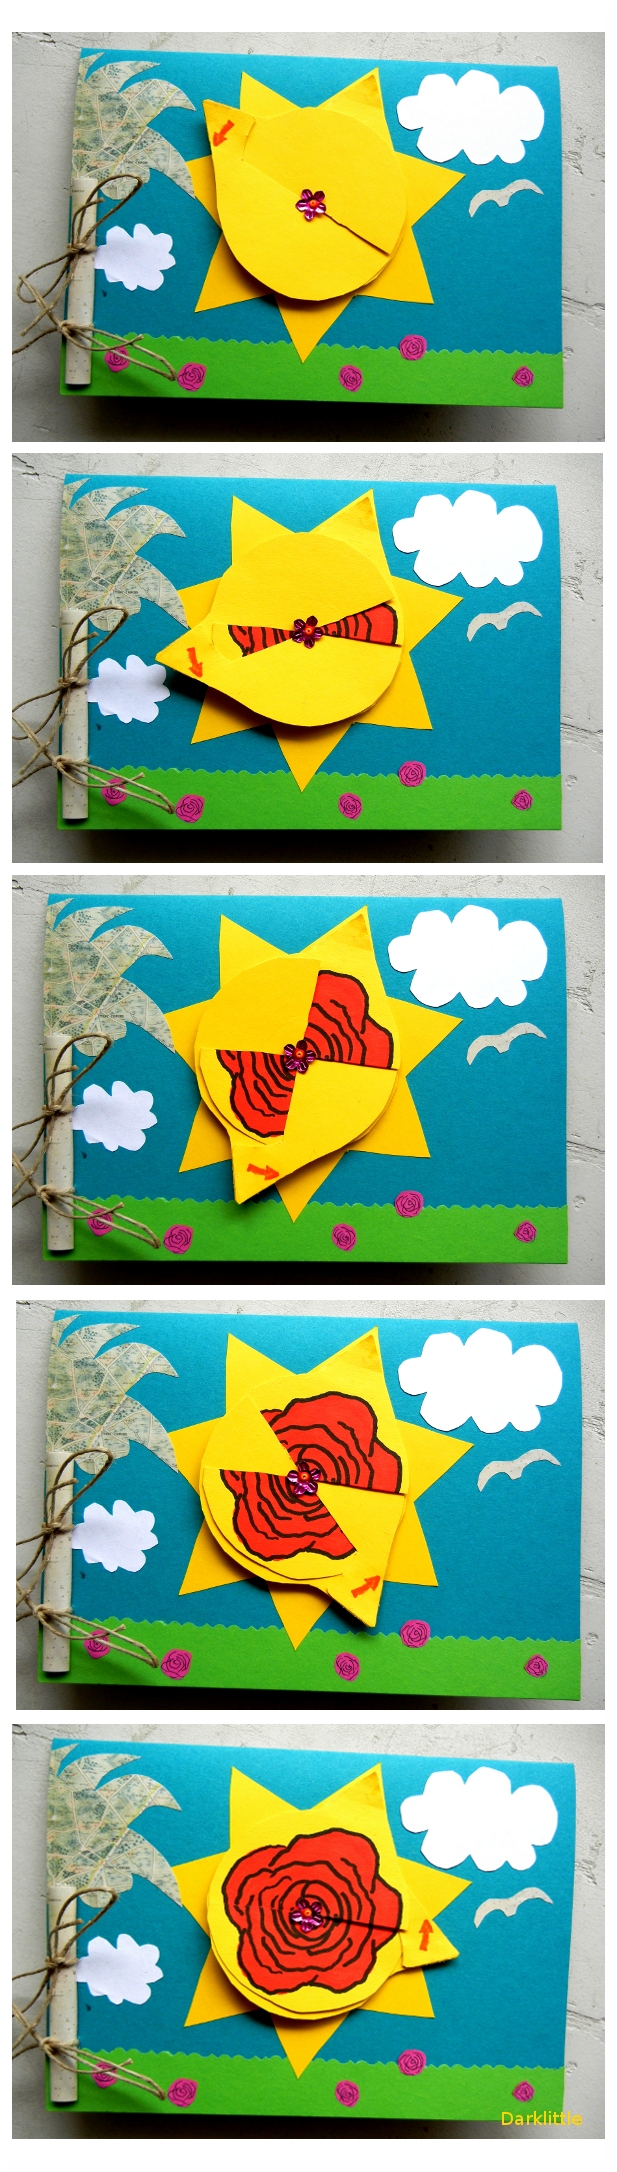
This is the front of the card. The palm tree on the left is made of a map of Montevideo (the book is called Die Rosen von Montevideo). If you unroll the palm tree’s trunk, there is a message that tells you (in an elaborated way) that you should find out what secret the sun holds and that you will find out about wonders which only the sun is able to perform. It also tells you to let the wind blow through the bay, over to the other shore and that there, in the shade, you will find yet another message. 🙂
Well, as you can see, that palm tree is not the only interesting thing on that first page of my card. There is the sun. And it is supposed to hold a secret. Now you probably peeked while reading and found out what wonders the sun is able to perform. 🙂
I remember these changing pictures from a children’s book I had (and recently bought in a used book shop) and thought “I wanna try making one of those!”. And so I did. I found an easy tutorial on Extreme Cards and tried it. As you can see, it worked 🙂
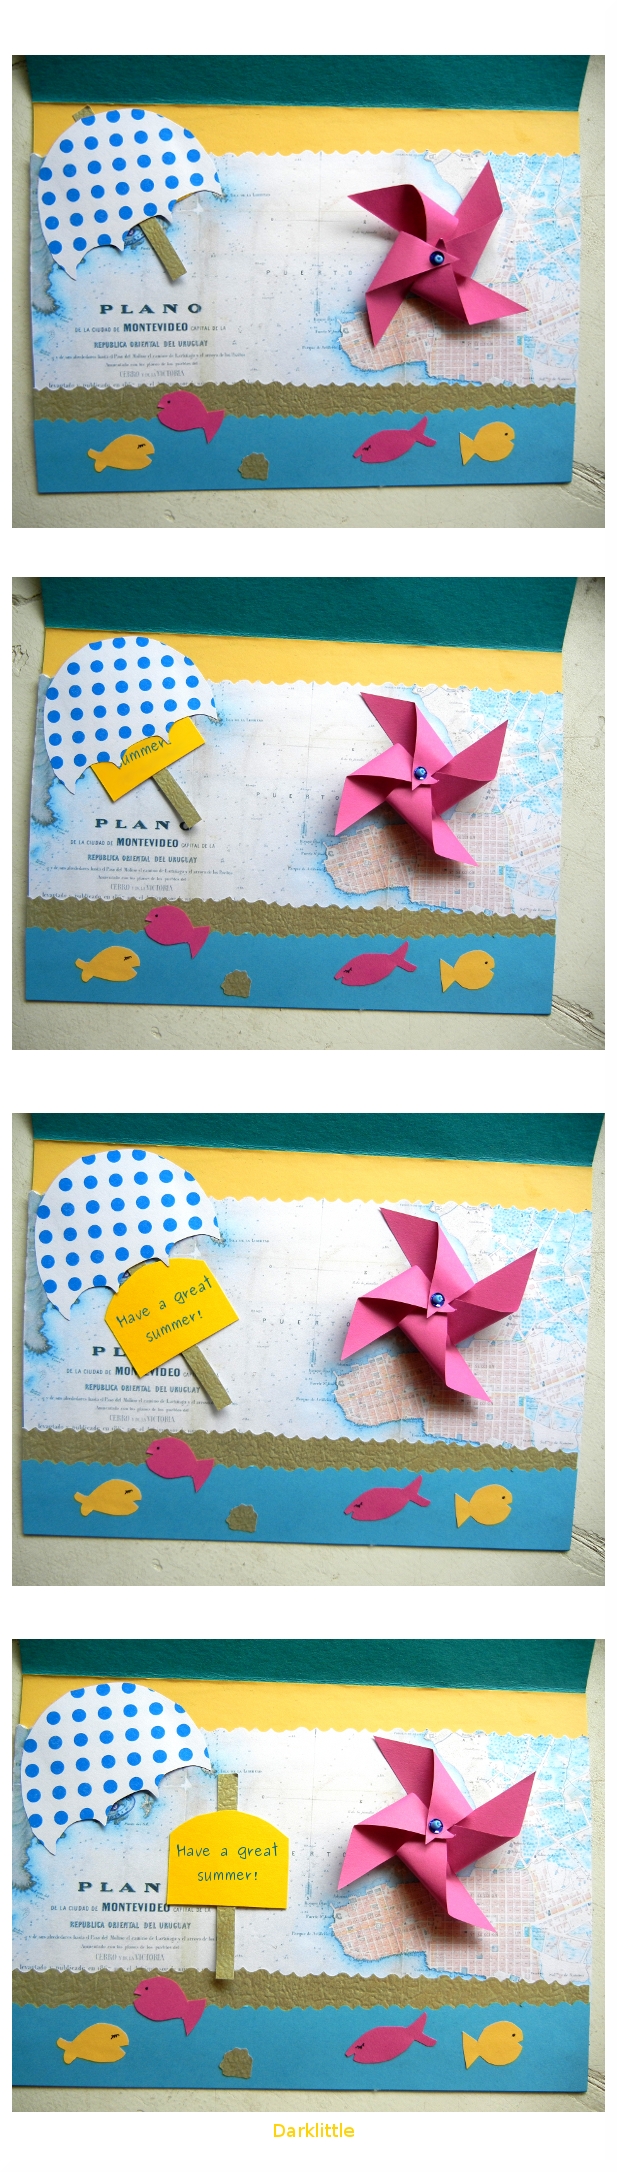
Now on to the inside of my card. Here you can see the sea (with a few fish and a shell) and a map of Montevideo in the 19th century (we gotta stay true to the book haha). As I wrote in my little palm tree note, the reader now has to let the wind blow through the bay, and if they do so, the little pin wheel will turn (cute eh?).
Then we’ll travel on with the wind to the other shore (where it’s quite hot and sunny I’m afraid). But what’s that? A dotted umbrella that promises shade. And didn’t that note say something about shade too? Well let’s go over there. I’m hot!
Something seems to be loose on that umbrella. I’ll pull. Haaaa… Look there! A message!
Actually, the original message was a little different but this one is for you!

 Last weekend I decided to put away my books and do some crafting instead. With Valentine’s Day coming up I was in the perfect mood for something creative and when I saw the Inky Paws Challenge on the Newton’s Nook Designs blog, I thought why not try something like that for a change.
 I chose the birds and decided to place them in front of a tree. Because I wanted two birds, I mirrored the digital stamp on my computer. To color the birds and the balloon, I used my Faber Castell watercolor pencils. I made a background stamp for the tree out of Fifty-Fifty silicone putty that I still had at home from a Halloween project. I also added a few leaves that I punched with a big heart punch and some yarn for the birds to stand on.